Managing Your Kiddo’s Availability on the Parent Portal Website
Last updated: November 12, 2026
Coming soon!
Quick Overview
Availability helps you share when your kiddo can attend sessions. You can set their regular weekly hours, share extra availability during school breaks, and mark dates when they cannot attend because of vacations or doctor appointments. This guide walks through updating those hours on the Parent Portal website and reviewing appointments affected by a change.
What to Know First
Before making changes, please check that the correct child is selected.
Open Availability
To get started, select Availability in your child’s portal. You can also open an availability link shared by your clinic. Both entry points use the same availability tools.
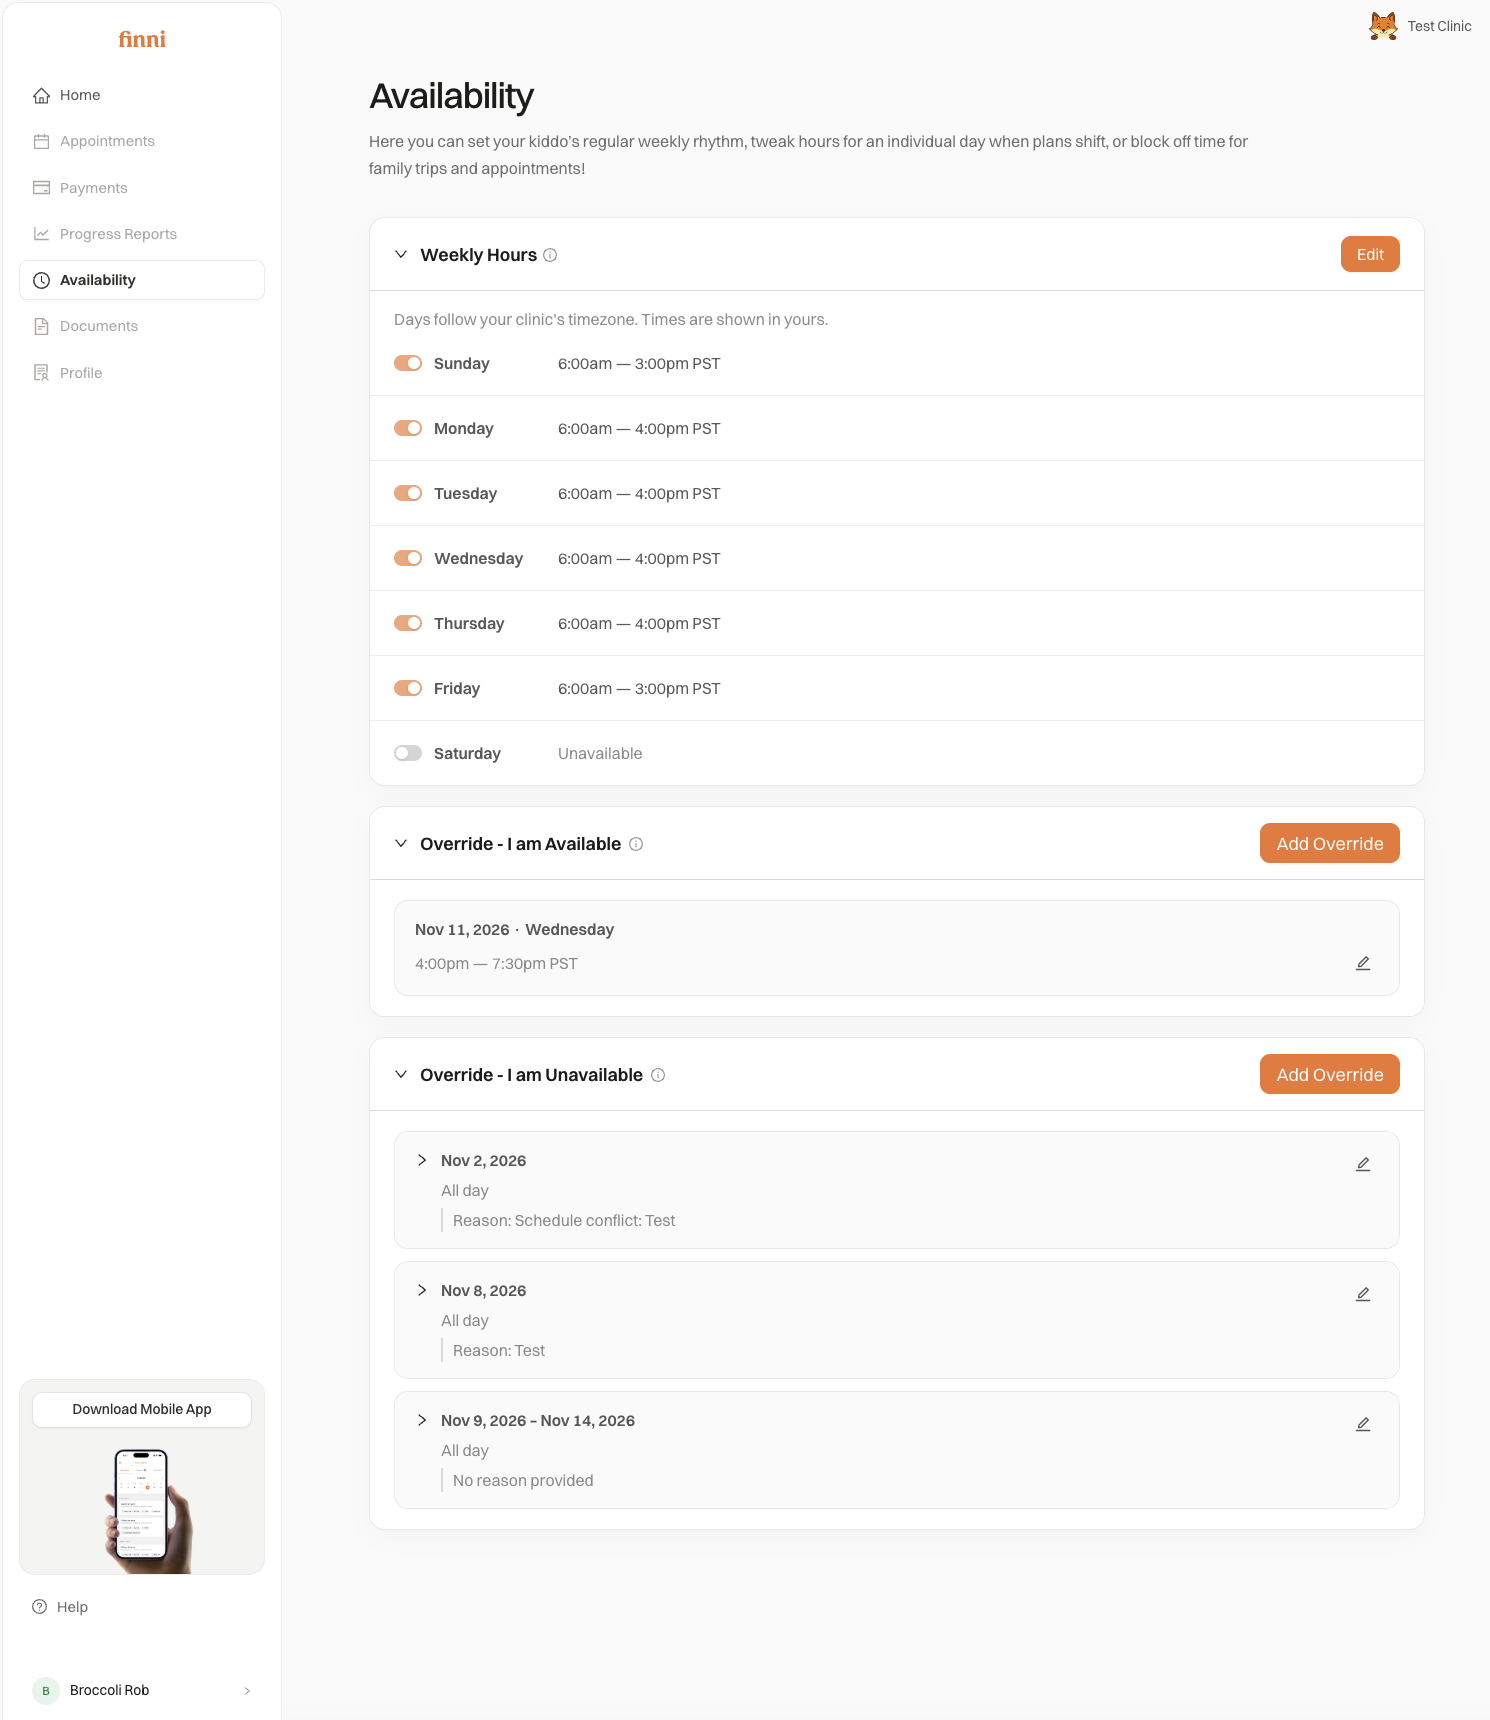
On the website, Availability brings your weekly routine and dated changes together.
Set the usual weekly hours
Weekly hours describe your kiddo’s usual availability each week.
In Weekly Hours, select Edit or the pencil button on a smaller screen. Turn on the available days and enter the start and end times. Use plus for another time window, copy to reuse a day’s hours, and trash to remove a window. Time windows cannot overlap.
Select Save when the week looks correct. Cancel leaves without saving your edits. Updating weekly hours does not move or cancel booked appointments.
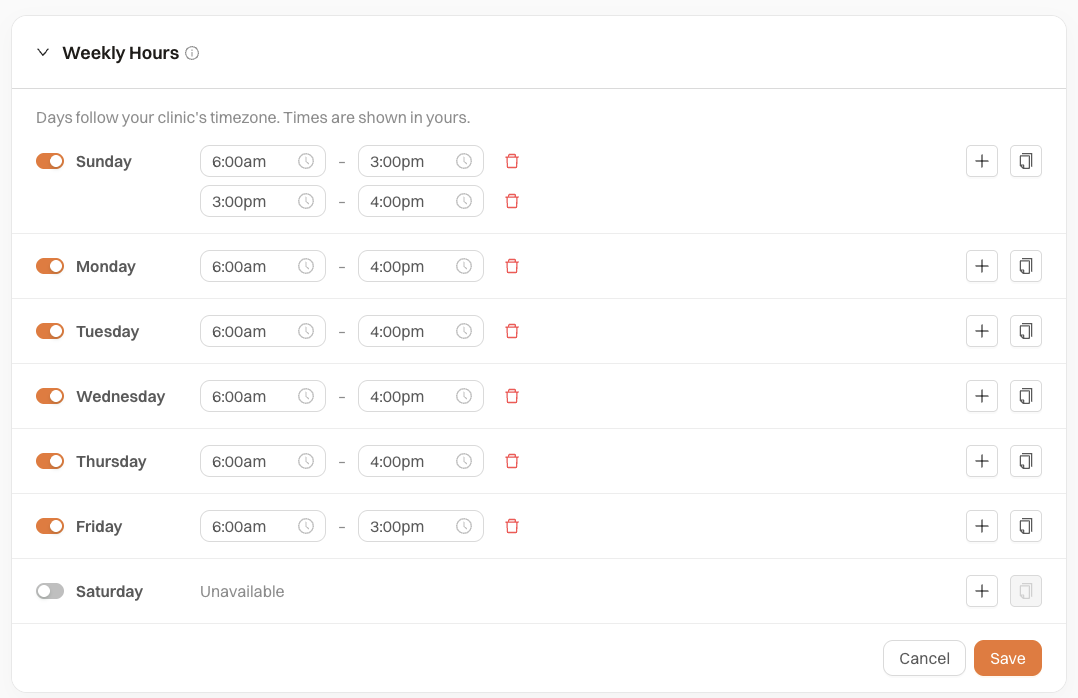
You can keep more than one time window on a day and save when the week looks correct.
Change available hours for one date
An available override lets you adjust your kiddo’s hours for a specific day while keeping their regular weekly schedule the same. For example, your kiddo might usually be available 3:00 pm–6:00 pm but be available 9:00 am–6:00 pm on a day off school.
In Override - I am Available, select Add Override and choose one date. Enter Start Time and End Time, or turn on All Day for the full day. These hours replace that date’s weekly hours, so include the full time your kiddo is available.
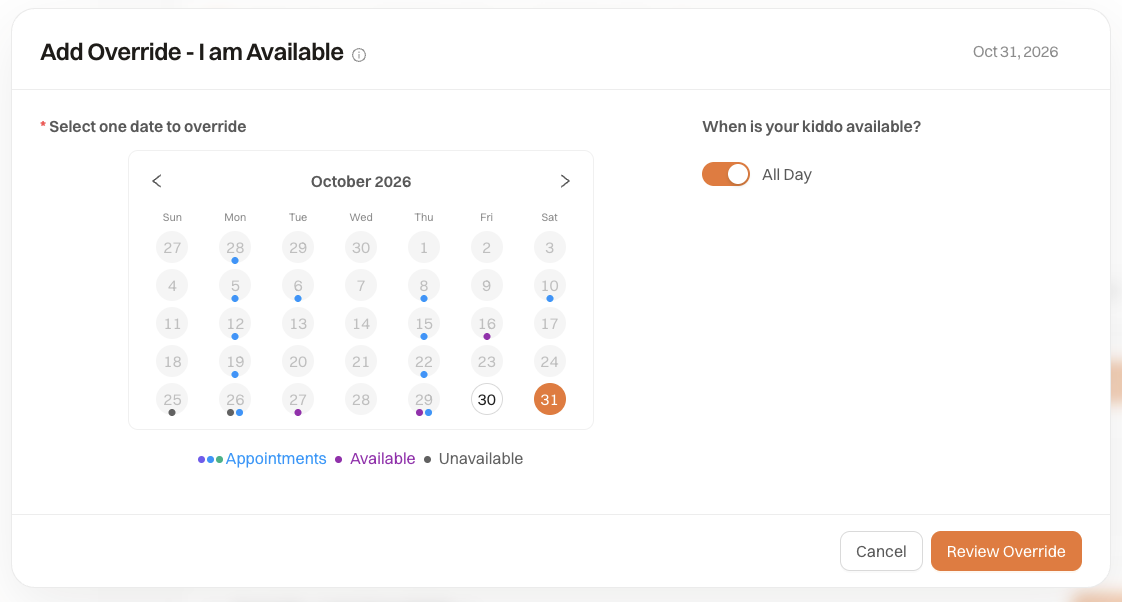
This example marks one date available all day. Turn All Day off to enter specific hours.
Mark time as unavailable
Unavailable time is useful when your kiddo cannot attend during their usual hours, such as for a doctor’s appointment or vacation.
In Override - I am Unavailable, select Add Override. Choose one date or the first and last dates of a consecutive range. Every day between them is included.
Keep All Day on for full days. For specific hours, turn it off and complete Start Time and End Time. For a range, those hours apply on each selected day.
Saved unavailable time still applies when the same date also has an available override. For example, if the saved available hours are 9:00 am to 5:00 pm and 1:00 pm to 2:00 pm is marked unavailable, the available windows are 9:00 am to 1:00 pm and 2:00 pm to 5:00 pm. To make that hour available again, edit or remove the unavailable entry.
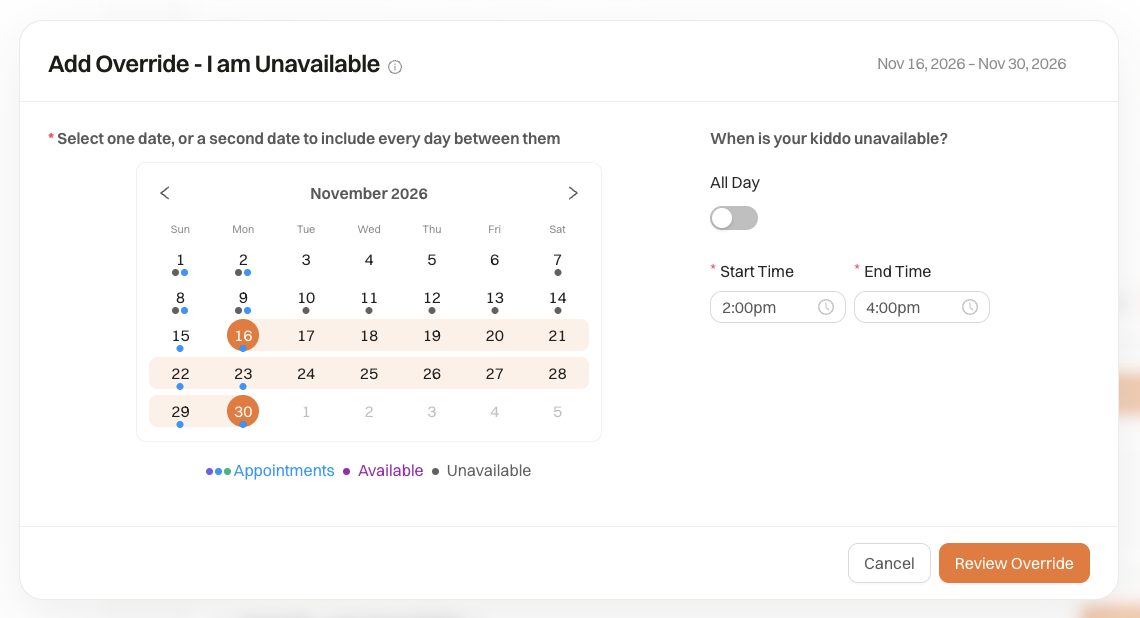
For a timed range, the selected hours apply on every date between the start and end.
Resolve overlapping saved entries
Sometimes a selected date already has saved availability that needs updating before you can continue.
Select See conflicts to open the saved entries, then use Edit or the pencil beside the entry you want to change. Update or remove it before returning to your new change.
To preview date details, hover over a marked date with a mouse. On phones and smaller tablets, you can long press a marked date to open its details.
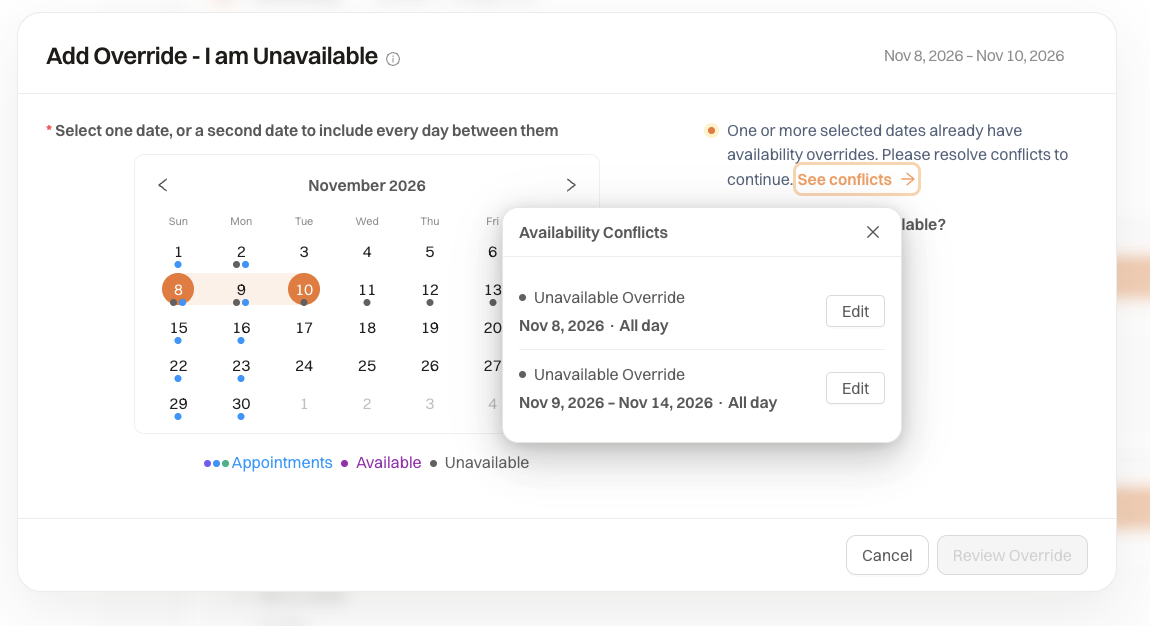
See conflicts shows which saved entries need your attention.
Review your change before saving
Select Review Override in the editor to review your change. If no appointments are affected, you’ll see Confirm Available Hours or Confirm Unavailable Time. Check the summary, then select Confirm.
If appointments are affected, Confirm Availability Change opens. Review the names, dates, and times under Appointments To Cancel. For appointments you can request to cancel here, choose a Reason for cancellation, add any helpful Cancellation notes, and select Request Cancellation & Confirm.
Some appointments may ask you to contact your clinic instead. Please reach out so your clinic can help with those cancellations. If every listed appointment needs clinic assistance, select Confirm to save your availability.
You can add a reason for unavailable time even if no appointments need cancellation. When you confirm, your availability is saved and any cancellation requests go to your clinic for review. The appointments stay on your calendar until your clinic approves the requests. You can use Back to return to the editor before confirming.
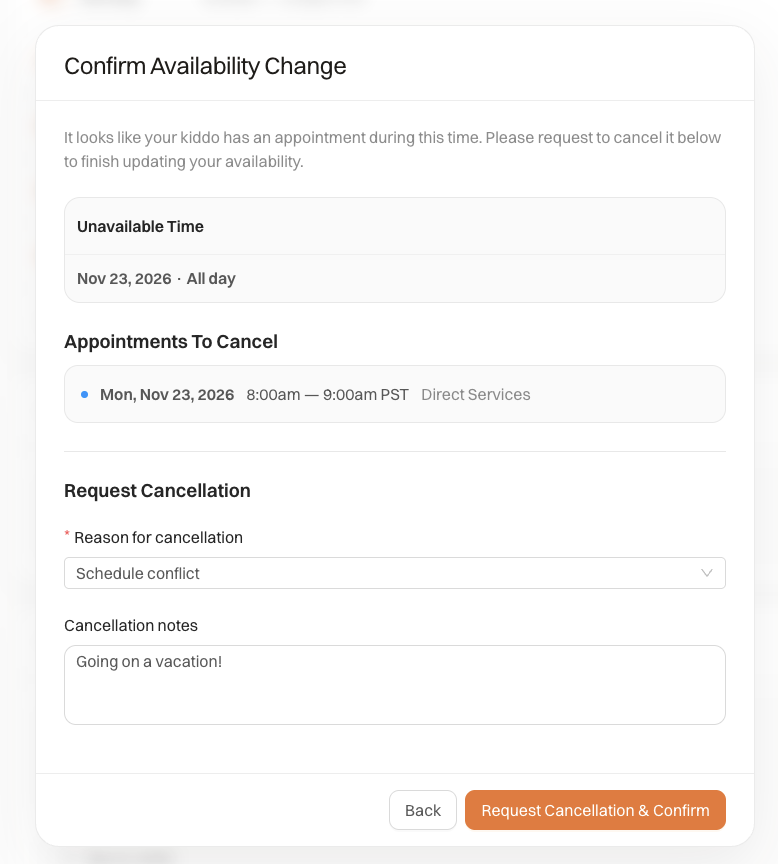
Review the appointment details and cancellation request before confirming your availability change.
Edit or remove saved availability
When plans change again, use the pencil beside a saved entry. An available override keeps its saved date while you edit the hours. To use a different date, remove the entry and create a new one.
To remove an entry, open it, select the trash button, and confirm. For a grouped unavailable entry, removal applies to the whole saved range.
Deleting an available override brings back the regular weekly hours for that date. Deleting unavailable time clears that saved block. Neither action sends cancellation requests, so your appointments stay on the calendar. Check the remaining availability after removing an entry.
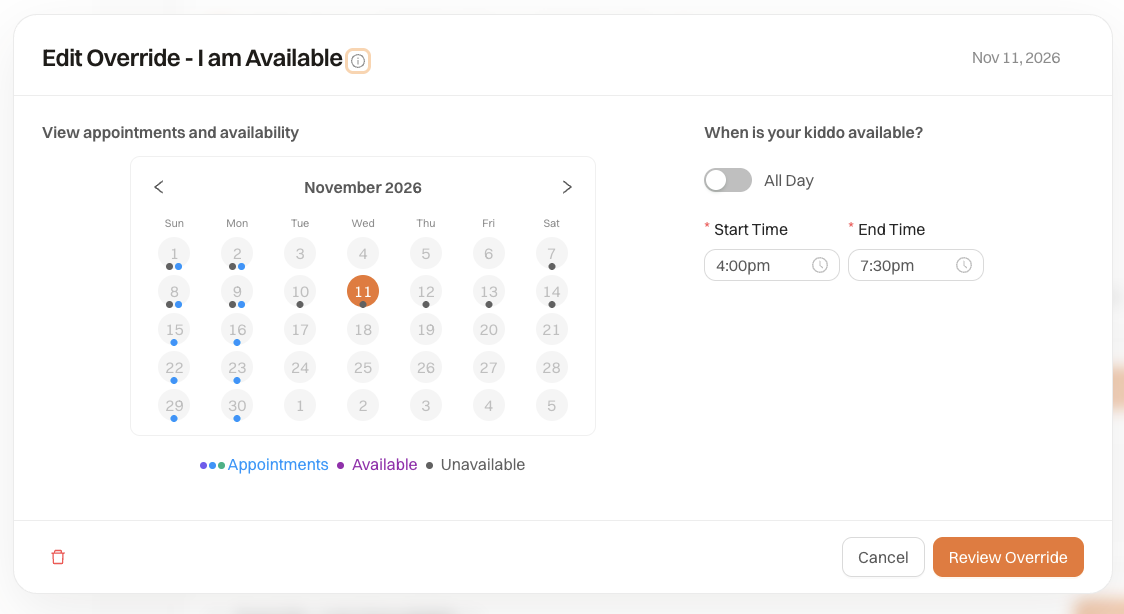
The editor lets you update the saved hours or remove the entry with the trash button.
Tips, Tricks & Troubleshooting
If the confirmation says appointments changed, review the updated list before confirming again.
If you are unsure whether a change saved, refresh Availability and check the saved entry before retrying.
All data and names displayed are simulated for demonstration purposes.